Editing the WordPress .htaccess file is easy if you know how Apache servers work. But if you are new to the world of WordPress or cPanel, it can be troublesome. Believe me, it took me months of breaking my website and getting it back up to be confident enough to play with the .htaccess files of my websites.
You should not change or edit WordPress .htaccess files if you don’t know what you are doing. It can break your website and redirect all of your traffic to another website—worse, it can even transfer all the page authority and link profile you earned to another website. However, if you know what you’re doing, .htaccess can make life seem easy and smooth when you migrate your website to a new domain or make significant changes to your website URL structure.
In the last two articles, we went through htaccess SEO techniques and demonstrated how to write the code for different .htaccess 301 and 302 redirects. There are two methods to edit WordPress .htaccess files to set up those redirects. We’ll go one by one.
How to edit WordPress .htaccess files
Depending on your WordPress expertise and convenience, you can use any one of the following two methods to edit the .htaccess file. They all will do the job, and it makes no difference which method you go with.
The easiest one is the second method, which uses the Rank Math plugin and can be done from the WordPress dashboard itself. But if you want to go into your website files and get it done from the root, you can follow the first method.
1. Edit .htaccess file using cPanel File Manager
The .htaccess file is located in the root folder of your website. In this method, you directly go to the root of your website where all the website files are hosted, find the .htaccess file, and edit it as required.
1. Log in to your cPanel.
cPanel is a simplified web hosting control panel that allows you to manage your website, such as the files, email, and other resources. If you’re using WordPress, you can manage your website through cPanel.
You can either go to your hosting account and log in to the cPanel from there, or you can use the direct link to the login page of your cPanel.
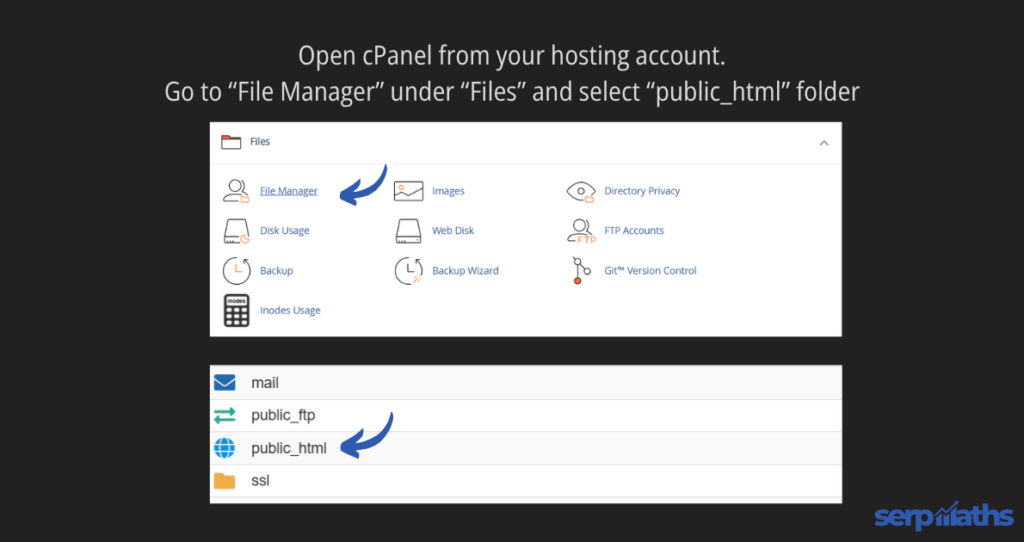
2. Go to File Manager
Open the File Manager in cPanel and go to the public_html folder. The .htaccess file is located in the public_html folder.
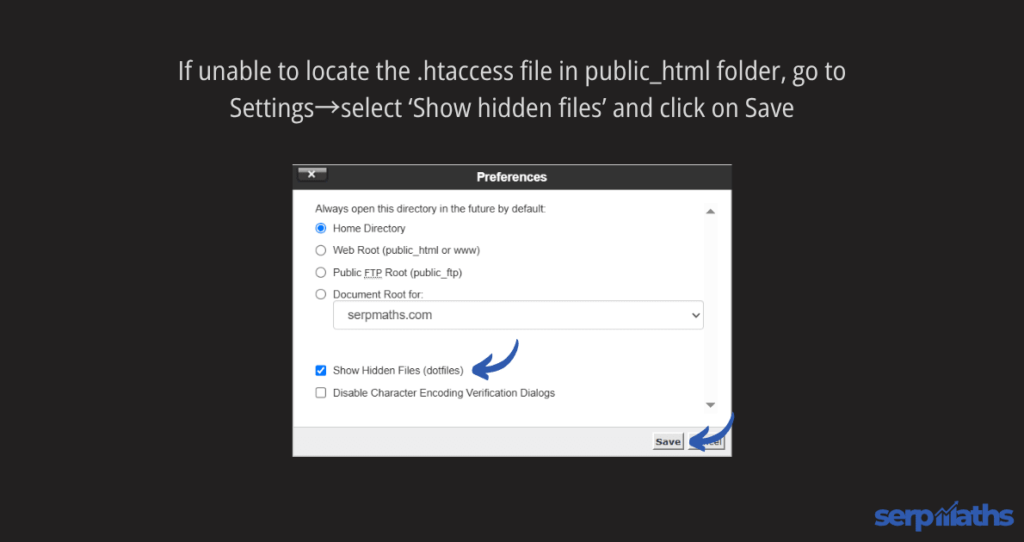
If you can’t find the .htaccess file in the public_html folder, go to ‘Settings’ in the top right corner and select preferences. In the pop-up window, check if the ‘show hidden files’ checkbox is selected. If not, check the option and save the settings by clicking on ‘Save’. Now, you’ll be able to locate the .htaccess file.
3. Edit the .htaccess file
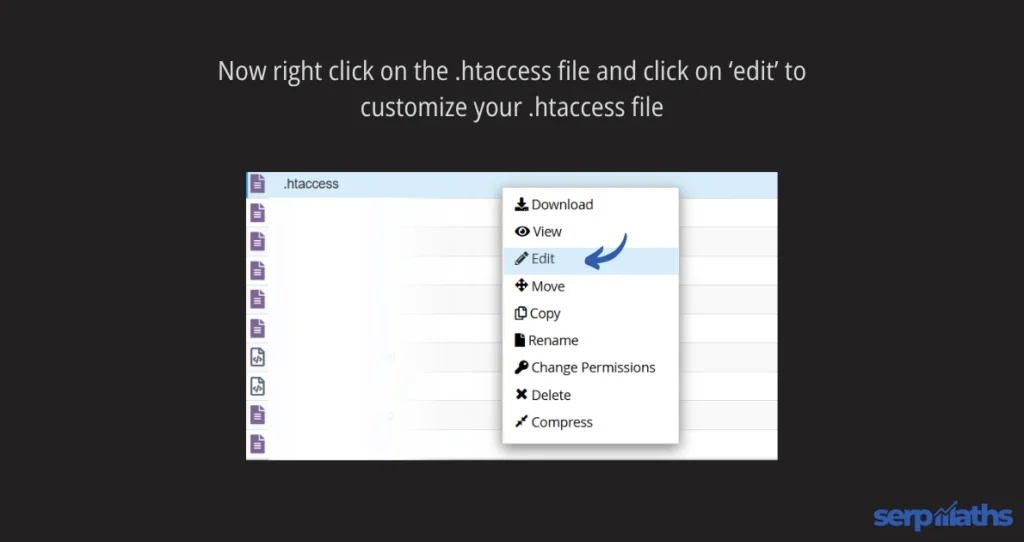
Right-click on the .htaccess file and click ‘Download’ to save a backup of your .htaccess file and restore it if anything goes wrong.
Once the download is complete, right-click again and select ‘Edit’. In the new tab, you can make the required changes. After editing, click on ‘Save,’ and congrats, you have now edited your .htaccess file directly.
2. Edit .htaccess file using the Rank Math plugin
RankMath is a WordPress SEO plugin that assists in all aspects of managing WordPress SEO, including editing the WordPress .htaccess file.
If you’re using the RankMath SEO plugin on your website, you can easily edit .htaccess file right from the WordPress dashboard.
1. Go to WordPress→ RankMath SEO→General Settings
Log in to your WordPress dashboard and go to RankMath SEO in the left toolbar. Then select General Settings.
2. Go to ‘Edit .htaccess‘
In the Rank Math General Settings window, select Edit .htaccess. You’ll see the contents of your .htaccess file in a scrollable code editor.
You can edit the .htaccess file in the code editor as required. And when you’re done, don’t forget to hit ‘Save Changes’.
When you’re using Rank Math, you don’t need to create a backup of your .htaccess file before editing it since Rank Math creates a backup of the .htaccess file periodically.
If you want to restore your .htaccess file, simply navigate to the public_html folder through cPanel as explained in method #1, copy the contents of the file named ‘.htaccess_back_xxxxxx,’ and paste it into your .htaccess file.
WordPress .htaccess file: FAQs
Where is the .htaccess file in WordPress?
The .htaccess file is located in your website’s root folder. If you’re using WordPress, you’ll find it in the public_html folder.
How do I update a .htaccess file?
Go to your cPanel→File Manager→public_html folder. You’ll find the .htaccess file there. Right-click on the file and select edit. The .htaccess file will open in a new code editor tab. Make the required changes or add the redirect rules and hit ‘Save Changes’ in the top right corner. For a step-by-step guide, refer to this section of the article.
Is .htaccess necessary?
If you’re using shared hosting for your WordPress website, a .htaccess file is necessary to control how your website is presented to the users and how the URLs are structured. However, if you can access the main server configuration file, you might not need a .htaccess file.